
Basic Strawberry Jam Recipe
Makes about 8 250 ml jars of jam
- 7 c. sugar
- 8 c. whole strawberries
- 4 tbsp lemon juice
- 1 package regular fruit pectin
- Place your clean jars in a water bath canner, cover with water and bring to a simmer. Do not boil. Add your two piece lids.
- Measure out your sugar in a bowl and set aside.
- Wash your berries, drain and remove hulls. (Feed them to your chickens if you have them, they’ll go batty!)
- Slice berries into a large, heavy bottom pan. (If your fruit is super soft or you like really chunky jam, you can skip this step.)
- With a potato masher, squash your fruit until it reaches your preferred consistency.
- Add lemon juice to strawberries. Stir in the pectin until dissolved.
- Bring to a full boil over high heat, stirring often. Don’t leave it!
- Add sugar all at once. Bring it to a hard boil, stirring constantly. Once you get it to a rolling boil that can’t be stirred down, keep it there for one minute.
- After the one minute is up, turn off the heat and skim the foam. (Some grammas don’t do this – saying its a waste and just stir it in. I don’t know what the benefit of skimming is, other than you’ll have cloudy jam if you don’t.)
- Fill the jars one by one. Pour the water back into the canner and place the jar on a tea towel near your pot. Place the funnel on and carefully (it’s HOT!) ladle the jam in leaving 1/4 inch space at the top. Wipe the rim with a damp paper towel and carefully place the lid on. Don’t weld it on there, just fingertip tight is fine.
- Once you’ve filled all the jars, place them back in the water bath canner, ensuring they are covered with water. Bring the canner to a full boil. Once its at the boiling point, start timing 10 minutes. After 10 minutes, turn off the heat. Allow the canner to cool for 5 minutes. With a jar lifter, carefully remove the jars from the canner. Place them on a tea towel and allow to cool.
- Before you store your jam, check the safety seal is down on all your jars. The lid shouldn’t give when pressed. Any that don’t “pop” can either be reprocessed or popped in the fridge to be eaten right away.
- A good rule of thumb is to eat up all your preserves before you’re ready to make them again the next year.
Strawberry Jam Variations

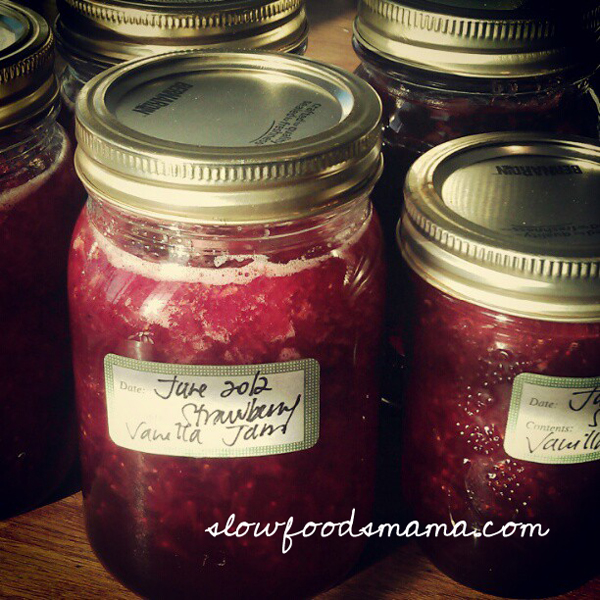
Strawberry Vanilla Jam:
Slice a vanilla bean in half, scrape the seeds and add everything to the mashed strawberries. Proceed as normal with the rest of the recipe.
Strawberry Balsamic Black Pepper Jam:
Use only one tablespoon of lemon juice. Add three tablespoons of good quality balsamic vinegar to the mashed strawberries. After skimming, add two teaspoons of fine freshly cracked black pepper and stir in.

